
DIY Shade Sail Installation: A Step-by-Step Guide for Patio UV Protection
With summer just around the corner, it’s the perfect time for outdoor fun. But before you dive into patio parties and backyard workouts, make sure you’re protected from the sun’s harsh rays with a stylish and practical shade sail.
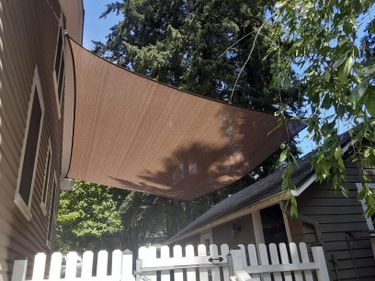
Shade sails are a popular choice that takes both practicality and decorativeness into account. They can be provided in a variety of colours, shapes and sizes, but this also makes many customers neglect the details of planning and installation.
Read the following carefully to learn the basics of installing a shade sail correctly.
Tools & Hardware You’ll Need
Essentials:
- Tape measure → for precise sizing
- Level → ensures even anchor placement
- Pencil → marks fixed position
- Drill → creates pilot holes
Shade sail kit:
- Turnbuckles → for tensioning
- Snap hooks → attach the sail
- Pad eyes → anchor points
- Screws and plastic expansion → secure mounting
Optional:
- Ladder → for hard-to-reach anchor points
- Steel cable or rope → for temporary fixes
- Posts → if existing structures aren’t viable
- Concrete → for reinforcing support structures
Pro Tip: Not all shade sail kits are identical—opt for user-friendly kits with durable, weather-resistant hardware for easier installation.
Step-by-Step Installation Process for Shade Sails
Follow these detailed steps to securely install your shade sail and enjoy stylish sun protection in your outdoor space.
Step 1: Verify Sail Dimensions and Installation Location
Unpack the shade sail, check that the dimensions match your requirements (the usual tolerance is ±4 inches). Do a trial fitting to confirm the coverage and alignment.
- Factor in the sun’s angle to maximize shade coverage throughout the day.
- Choose sturdy anchor points—such as trees, posts, or building walls. If these aren’t available, install dedicated shade sail posts.
Step 2: Install Anchor Hardware
For a stable and long-lasting installation, ensure your supporting structures (posts, walls, or trees) are sturdy enough to handle the tension loads.
- Drill pilot holes for plastic anchors, then secure the pad eyes with screws.
- Attach snap hooks and partially loosen the turnbuckles by at least 50% to allow room for tensioning later.
Step 3: Hang the Sail
Lay the sail seam-side down and attach its D-rings to the snap hooks or turnbuckles.
- Your sail should feel taut—this is normal.
- If the sail seems too tight, temporarily bridge the gaps with rope or steel cable. The cloth will stretch slightly.
Step 4: Tension the Sail
Gradually tighten the turnbuckles until all edges are wrinkle-free and the tension is evenly distributed.
- Avoid over-tightening, as this can stress the fabric and reduce its lifespan.
- Avoid excessive relaxation and ensure pre-tensioning to prevent the sail from becoming unbalanced and sagging.
Pro Tips for a Secure, Long-Lasting Installation

Hardware Positioning:
- Leave 0.5–1 ft of space between the sail and anchors to accommodate the tensioning hardware.
- Drill perfectly level holes for the pad eyes to prevent uneven stress.
- Use adjustable hardware (like turnbuckles) on at least two corners for fine-tuning the tension.
Other Details:
- Windy Areas: Angle the sail to reduce wind resistance.
- Controlling Size: The sail size should match your desired shaded area, but the actual anchor point spacing should be reserved by 5%-10% to account for the sail's extension after it is tensioned.
- Ground Anchors: Use concrete footings to reinforce stability.
- Water Runoff: Tilt at least one corner 15° higher than the others to prevent pooling and sagging.
- Tensioning Tip: Use adjustable hardware (like turnbuckles) on at least two corners for fine-tuning.
Enjoy Your Stylish, Sun-Safe Outdoor Space!
Now that your shade sail is installed, it’s time to kick back and enjoy your sun-protected oasis. Whether you’re hosting a backyard barbecue, creating a shaded play area, or simply relaxing with a book, your DIY shade sail adds both comfort and curb appeal.