

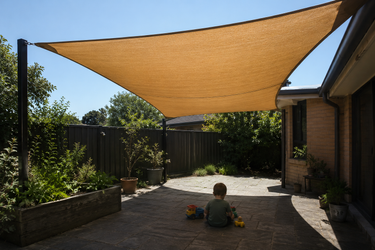
Troubleshooting 101: Why Is My Shade Sail Sagging and How to Fix It?
If your shade sail is sagging, the cause is usually not the fabric itself alone. In most cases, a sagging sail results from one or more installation and maintenance issues, such as insufficient tension, undersized hardware, overly long spans, weak attachment points, or fabric stretch over time. The good news is that in many situations, you can fix sagging shade sail problems by adjusting the sail’s geometry, upgrading the tensioning hardware, or following a more consistent shade sail maintenance routine.
A properly installed shade sail should look taut, stable, and intentionally shaped rather than loose or drooping. Beyond appearance, sagging matters because it can reduce shade performance, increase wind movement, place extra stress on corners and hardware, and, in the case of waterproof sails, create water pooling. That is why understanding why a sail sags—and how to correct it—is important for both performance and longevity.
What a Properly Tensioned Shade Sail Should Look Like
A well-installed shade sail should not hang like a loose tarp. Instead, it should have a smooth, tensioned surface with a slight twist or hyperbolic shape, depending on the design. That tension helps distribute loads more evenly across the fabric and attachment points.
For breathable HDPE sails, a taut shape improves appearance and reduces flap in windy conditions. For waterproof PES sails, correct tension is even more important because the sail must maintain slope and drainage. If the fabric starts to droop in the middle, water may collect and increase the load on both the sail and its supports.
In other words, if your sail looks noticeably loose, it is usually a sign that some part of the system needs attention.
The Most Common Reasons a Shade Sail Starts Sagging
Shade sail sagging rarely happens for just one reason. More often, it develops when several small issues combine over time.
1) The Sail Was Not Tensioned Enough During Installation
This is the most common cause. A shade sail should be installed with enough pre-tension to create a firm surface. If the installer leaves too much slack at the start, the sail may look acceptable at first but gradually droop once exposed to sun, wind, and rain.
This is also why tensioning hardware matters. Without the right hardware—such as properly sized turnbuckles, pad eyes, shackles, and snap hooks—it becomes difficult to achieve and maintain the correct tension.
2) The Attachment Points Are Too Far Apart
A shade sail is not meant to be stretched like a sheet across an oversized opening. If the distance between mounting points is too large for the sail size, even a high-quality fabric can sag because the load is not being distributed as intended.
This often happens when people buy a sail based only on the area they want to cover, without accounting for the extra clearance needed for hardware and tensioning space.
3) Posts, Fence Mounts, or Wall Anchors Are Moving
Sometimes the sail itself is not the real problem. The issue may be the structure supporting it.
If a timber post leans slightly, a fence flexes, or a wall anchor loosens, the sail loses tension even if the fabric is still in good condition. A few millimeters of movement at one anchor point can translate into visible sag across the span.
4) Fabric Stretch and Weather Exposure Over Time
All outdoor fabrics experience some degree of change with long-term exposure. UV radiation, temperature cycles, moisture, and repeated wind loading can gradually affect how a sail performs.
Breathable HDPE fabrics are designed for outdoor use and are generally dimensionally stable, but no fabric remains completely unchanged forever. Waterproof fabrics can also relax slightly over time if they are repeatedly loaded by wind or water. This is why periodic shade sail maintenance is important even for a professionally installed system.
5) The Sail Shape or Installation Geometry Is Incorrect
Shade sails are engineered structures, not flat sheets. Triangle, rectangle, quadrilateral, and custom sails all need correct geometry to stay tensioned.
If all corners are installed at the same height without enough slope or opposing tension, the sail may not form the stable 3D shape needed to resist sagging. In many cases, a shade sail performs best when corners are set at different heights to create tension across multiple directions.
How to Diagnose the Real Cause Before You Fix It
Before trying to fix sagging shade sail issues, it helps to identify where the problem actually starts. Otherwise, you may tighten one component only to find that the real weakness is elsewhere.
A Quick Shade Sail Inspection Checklist
Check the following points before making adjustments:
- Look at each corner to see whether the hardware is fully tensioned or already at its limit.
- Inspect posts, wall plates, and fence attachments for movement, cracks, or loosening.
- Measure whether the sail has enough clearance for proper tensioning hardware.
- Check whether the center of the sail is holding water after rain.
- Look for fabric distortion, seam stress, or edge curling that may indicate uneven load.
This quick inspection usually reveals whether the problem is hardware-related, structural, or fabric-related.
How to Fix a Sagging Shade Sail Step by Step
Once you know the likely cause, you can take a more targeted approach. In many cases, the repair is straightforward.
Step 1: Retension the Sail Using Proper Hardware
If the sail has simply lost tension over time, the first step is to tighten it using the installed hardware. Turnbuckles are particularly useful because they allow fine adjustments at the corners.
If your current setup uses rope only or lightweight hooks, upgrading to dedicated tensioning hardware can make a noticeable difference. Stainless steel turnbuckles, shackles, and pad eyes generally offer better long-term stability than improvised fasteners.
When tightening, work gradually across the corners rather than pulling one corner to the maximum. This helps keep the load balanced and reduces the risk of distorting the sail.
Step 2: Check the Mounting Distances
If the sail still sags after tightening, measure the gap between the sail corner and the attachment point.
A common installation mistake is leaving too much distance between the sail and the structure. Shade sails usually need a controlled gap for hardware and tensioning, but if that gap becomes excessive, the hardware cannot compensate.
If necessary, you may need to relocate a fixing point, shorten the span, or choose a sail size that better matches the installation area.
Step 3: Reinforce or Replace Weak Attachment Points
If a post, fence, or wall bracket is moving, retensioning alone will not solve the problem. The structural support must be stable first.
For post-mounted sails, that may mean deepening the footing, increasing post size, or replacing a weakened timber post. For wall-mounted systems, it may involve upgrading anchors or moving the fixing point into a stronger structural element.
This is an important part of shade sail maintenance because the fabric can only perform as well as the structure holding it.
Step 4: Correct the Sail’s Shape and Slope
If the sail was installed too flat, especially in a waterproof application, adjusting corner heights may help.
A shade sail generally performs better when there is enough slope to shed water and enough variation in corner height to create a stable tensioned surface. If all corners sit at the same level, the sail may look neat from a distance but still sag in the middle.
Reconfiguring one or two attachment points can often improve both drainage and tension.
Step 5: Replace Worn or Inadequate Hardware
Hardware fatigue is easy to overlook. Corrosion, stripped threads, bent hooks, or undersized fittings can all reduce the amount of usable tension in the system.
If the existing tensioning hardware looks worn, it is usually worth replacing it rather than repeatedly adjusting a compromised setup. For long-term outdoor use, marine-grade stainless steel hardware is often the better choice because it resists corrosion and maintains strength over time.
When the Problem Is the Sail Size Itself
Sometimes the installation is sound, the hardware is strong, and the posts are stable—but the sail still does not sit correctly. In that case, the issue may be sizing.
A sail that is too large for the available mounting geometry often cannot be tensioned properly. Conversely, a sail that is too small may require overly long hardware extensions, which also creates instability.
This is one reason custom-made sails are often a better long-term solution than trying to adapt a standard size to an awkward space. A sail designed for the exact span, attachment layout, and intended tensioning range is more likely to hold its shape over time.
Why Waterproof Shade Sails Need Extra Attention
Sagging is especially important with waterproof sails because a low point can trap rainwater.
When water pools in the center of a waterproof sail, the load increases dramatically. This can pull the sail lower, strain seams, and even stress posts or anchors beyond what they were designed to handle. In other words, a small sag can quickly become a larger structural issue.
If you use a waterproof sail, it is worth checking slope, tension, and drainage after the first few rain events. That early inspection can prevent more expensive repairs later.
Warning Signs That a Waterproof Sail Needs Immediate Adjustment
- Water collects in one area after rain instead of running off.
- The center of the sail dips noticeably lower than before.
- One corner appears to be carrying most of the load.
- Hardware threads are fully tightened but the sail is still loose.
- Seams or webbing show visible strain.
These signs usually mean the sail should be adjusted as soon as possible rather than left until the next season.
Preventive Shade Sail Maintenance Tips
Good shade sail maintenance is not complicated, but it should be consistent. A short inspection a few times per year can help you catch problems before they turn into sagging, tearing, or hardware failure.
Simple Maintenance Habits That Help Prevent Sagging
- Inspect all corner hardware at the start and end of the hot season.
- Retighten turnbuckles if the sail has loosened after prolonged wind exposure.
- Clean debris from the sail surface so water does not collect around low spots.
- Check posts and anchors after storms or heavy rain. Remove the sail temporarily if severe weather exceeds the product’s intended conditions.
These habits improve appearance, reduce unnecessary stress on the system, and make it easier to fix sagging shade sail issues before they become serious.
Can a Sagging Shade Sail Be Prevented from the Start?
In many cases, yes. The best way to avoid future sagging is to treat the shade sail as a system rather than as fabric alone.
That means choosing the correct sail size, using strong attachment points, leaving enough room for tensioning hardware, and selecting a shape that suits the site. It also means deciding early whether breathable HDPE or waterproof PES is the better material for the application.
A professionally planned installation or a well-measured custom sail usually performs better than a generic sail forced into a space it was not designed for.
When It Makes Sense to Replace Rather Than Repair
Not every sagging sail should be repaired indefinitely. If the fabric is badly worn, the seams are failing, the shape was wrong from the beginning, or the installation area has changed, replacement may be the more cost-effective option.
This is particularly true if you are repeatedly trying to fix sagging shade sail problems caused by a poor fit. In that situation, a new custom sail with the correct geometry and better hardware may save time, improve appearance, and reduce future maintenance.
Conclusion
A sagging shade sail is usually a sign of low tension, weak support, incorrect geometry, or normal wear over time—not necessarily a failed product. The most effective fix starts with identifying whether the problem lies in the fabric, the hardware, the attachment points, or the original installation design.
If you want to reduce future adjustments and improve long-term performance, it helps to start with a well-sized sail and dependable hardware. SUNLAX offers custom breathable HDPE and waterproof PES shade sails in triangle, rectangle, quadrilateral, and custom shapes, making it easier to build a cleaner, more stable installation from the beginning.
It is possible that you also want to know:
Dog-Friendly Backyard: How to Keep Your Pets Safe from Summer Sun
Can Shade Sails Save You Money on Energy Bills? The ROI of Shade
City Living: Modern Balcony Privacy Screen Ideas for Apartments